
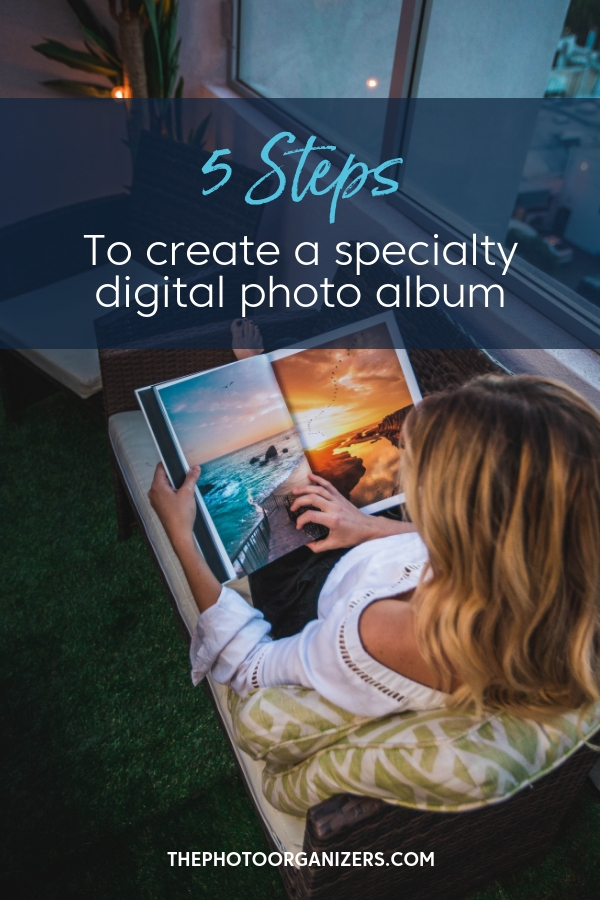
One of the easiest ways to enjoy your precious photos and memories is to create a specialty or “theme” album. It takes a lot of the guesswork out of trying to find each and every photo and gives you permission to work with what you have.
Here are five steps to create a specialty digital photo album easily and quickly.
Step 1: Decide on your theme.
Your theme can be as broad as holidays, vacations, friendships, birthdays with just the highlights from through the years. Or your theme can be one specific vacation, anniversary, milestone birthday…you get the idea, and you get to make your own rules. It does not have to be chronological!
Step 2: Gather a finite number of photos
Giving yourself some boundaries with a finite number of photos to gather really helps keep things simple.
Example…
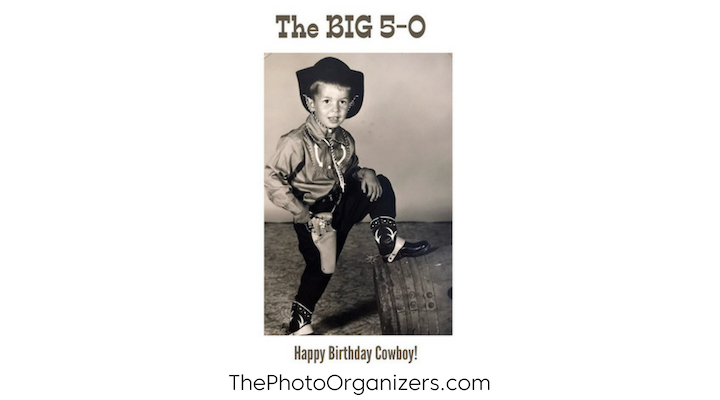
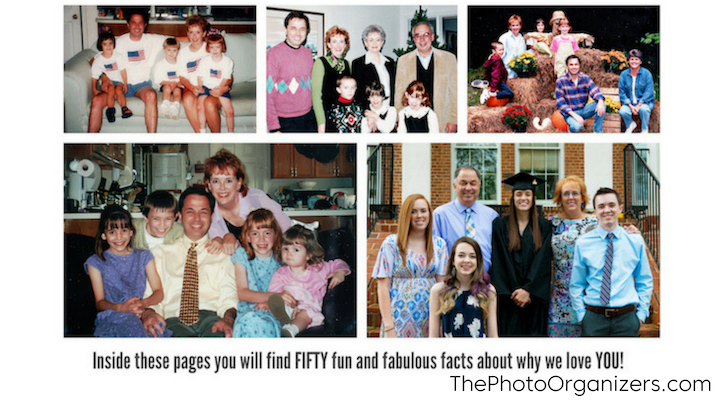
For my husband’s 50th birthday, my four kids and I each chose 10 photos which gave everyone a top ten list and became 50 reasons we love him.
If you decide to go with a broader theme, I suggest that you gather less than 100 photos of your theme and put them all in an “album project folder” on a USB flash drive or in a Dropbox folder. This way, no matter what computer you are using, you’ll have the photos available with just a few clicks.
Now go through the batch of photos for this theme and quickly rate them. This means eliminating any blurry or less than 5-star quality photos in the batch. Unless of course, that one blurry photo has significant meaning. Then it’s okay to include it!
Step 3: Write your captions and stories
Next, write down the stories or captions you want to make sure to include on the pages with these photos. It’s what makes a photo album become the treasured keepsake for everyone to enjoy. Type these out on your computer especially if you don’t love to write so you can proofread and edit. Then you will be able to copy and paste into your album pages in your next step.
Step 4: Upload photos and stories in design software
It’s time to choose your album printing vendor. For most DIY digital albums, the vendor has design software with pre-made templates built into their ordering software. I love Mixbook for this for ease of use. Other great choices for quality albums include Adorama Pix, Blurb and Mpix. I’m a big fan of white space, and I love clean, classic designs. It helps keep things simple, so it makes the photos the stars of the album.

Step 5: Order album
You are ready to order your photo album. Please be sure to proofread your pages (and ask someone else to proof them too!). Plus you can order multiple copies which is always fun to keep one for yourself and as a backup. The hardest part…waiting for it to arrive!
Enjoy and keep it simple so you can do this again and again. A photo album never goes out of style and is a gift from your heart!
If you aren’t ready to tackle this on your own, contact a photo organizer who will help you with each step or do it for you.
If you need help organizing and preserving your lifetime of photos, videos, and keepsakes, find a photo organizer near you at the Association of Personal Photo Organizers.
Don’t forget to grab your copy of Photo Organizing Made Easy: Going from Overwhelmed to Overjoyed from APPO founder Cathi Nelson.
 With over 25 years in the photo industry, I truly understand how overwhelming our photos and memories can feel because real life = busy. As a mother of four, I’m all about finding the funny in life and documenting our family’s life with photo albums, stories, and videos. At Photos with Sherita you can find me and my business partner, Rita, where we help you become your family’s photo hero! Join us on our podcast where we guide you on your journey of organizing your photos and sharing your family stories.
Great idea. I’ve made a lot of photobooks but I’m also starting to work on a smugmug family site. A bit of a learning curve but once I get a clear run and get it up and running it should be good. You can order photos into folders and sub folders etc.
I hope to show my son how to maintain the site for down the track. It’s something I want to really work on in the next twelve months.
Lesley-sounds like you are making great strides in getting your photos organized so you can enjoy them on SmugMug! I love SmugMug for that and it’s such a fun way to view your photos and videos in galleries by date or theme and use it myself! 🙂